POSTS
Rails on Kubernetes - part 2: Create the app
- 4 minutes read - 700 wordsThis is the second part of a series of posts on how to deploy a ruby on rails application to a kubernetes cluster. If you want to start from the beginning, part one is here
Now that we have our kubernetes cluster, we need to create something to deploy onto it.
For this walkthrough, I’m going to create a trivial rails application, which just stores a counter in a database, and allows you to increment it by clicking a button. This gives us a rails application which interacts with an external database (we’re going to use postgresql), which is enough to represent a ‘real’ rails application, for our purposes.
So, let’s get started.
Create the application
You need a current version of Ruby (I’m using 2.6.2) installed on your machine. If you don’t already have that, you’ll need to install it.
Once you have ruby 2.6.2 installed, ensure you have the latest version of rails (5.2.3 at the time of writing):
gem install rails
Now, create the ‘counter’ application:
rails new counter --database=postgresql
This will create a new rails application, in a folder called ‘counter’.
At this point, you should be able to do this:
cd counter
rails server
But, if you view the application, by pointing your web browser to http://localhost:3000, you will probably see this error;
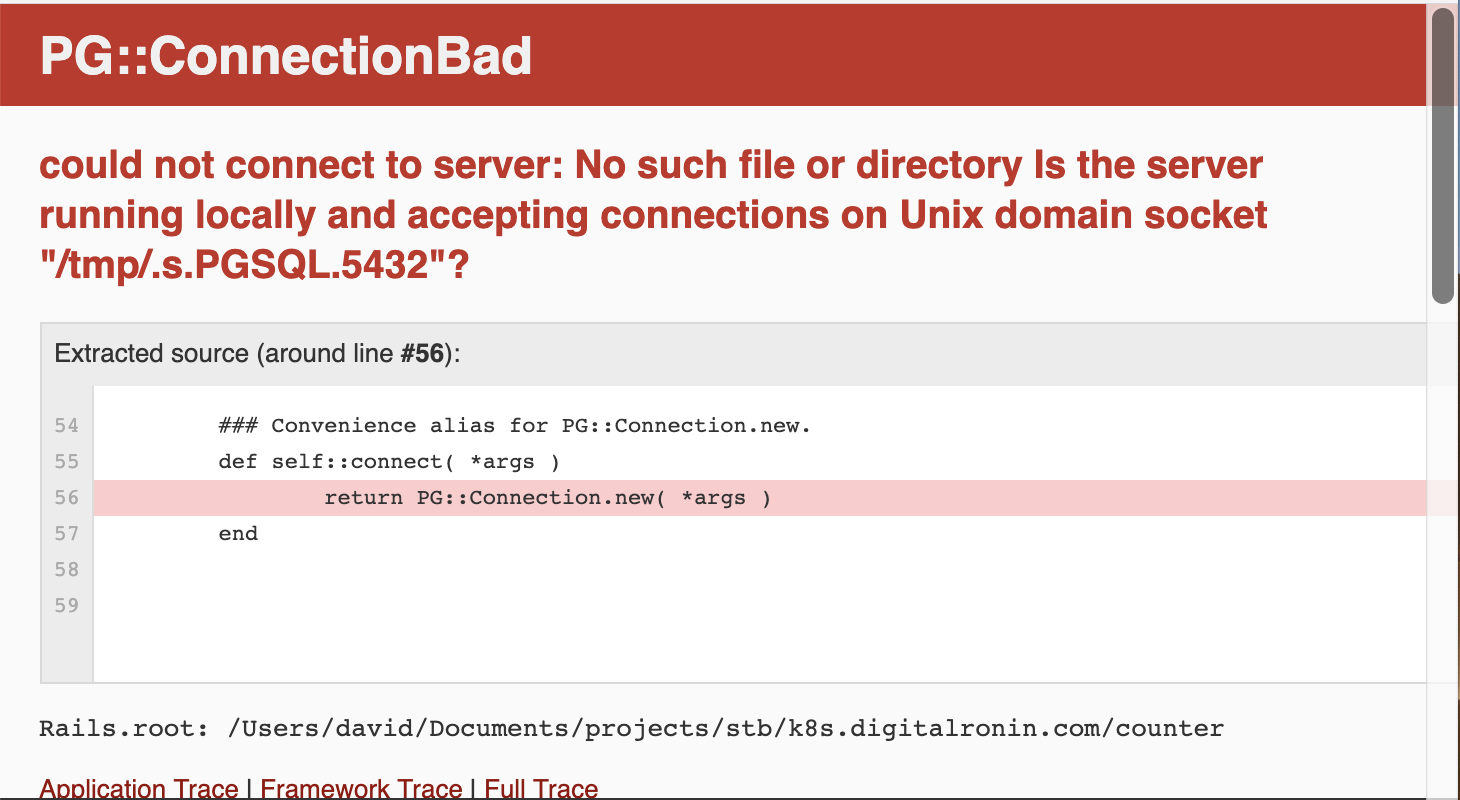
(If you already have PostgresQL running on your machine, you might not see an error at all. If that’s the case, skip over the next part)
This is because we told rails that our application should use PostgresQL as its
database (--database=postgresql), but we don’t have a PostgresQL server for
it to talk to.
Let’s fix that.
Run PostgresQL, via Docker
Rather than installing postgresql locally, we can just spin up a postgresql docker container for our application.
Execute the following command:
docker run \
  --detach \
  --rm \
  --name postgresql \
  --publish 5432:5432 \
  --env POSTGRESQL_USERNAME=my_user \
  --env POSTGRESQL_PASSWORD=password123 \
  --env POSTGRESQL_DATABASE=counter_dev \
  bitnami/postgresql:11.3.0
This will spin up a docker container based on the bitnami/postgresql image
(later on, we’ll explain the reason for using the bitnami version, rather than
the standard postgresql image), with the tag (version) 11.3.0. Here’s what the
other parameters are doing:
--detach- run the container in the background--rm- remove the container when it exits--name postgresql- give the container a name we can use to reference it--publish 5432:5432- forward port 5432 on our local machine to port 5432 on the container--env NAME=value- set some environment variables inside the container
To stop (and remove) the container, run:
docker stop postgresql
The environment variables cause the container to create a database and a
database user for us, when it starts up. To see the effect of this, stop the
container and then try the docker run command again, without the --detach
flag. In the output, you should see these lines:
...
INFO  ==> Starting PostgreSQL in background...
/tmp:5432 - accepting connections
INFO  ==> Creating user my_user
INFO  ==> Grating access to "my_user" to the database "counter_dev"
...
Either leave that one running, or stop it with Control-C and start another
one detached. To confirm the container is running, execute:
docker ps
You should see something like this:
CONTAINER ID        IMAGE                       COMMAND                  CREATED             STATUS            PORTS                    NAMES
9f483a378538        bitnami/postgresql:11.3.0   "/entrypoint.sh /run…"   3 seconds ago       Up 3 seconds        0.0.0.0:5432->5432/tcp   postgresql
Configure rails to talk to the database
In your counter rails project, edit config/database.yml
Around line 24 or so, you should see this:
development:
  <<: *default
  database: counter_development
That’s telling rails how to connect to the database when running in development mode.
Replace those three lines with this:
development:
  <<: *default
  url: <%= ENV['DATABASE_URL'] %>
Now go back to the terminal where you started rails and restart it by pressing Control-C and then executing:
DATABASE_URL="postgres://my_user:password123@localhost/counter_dev" rails server
This time, when you visit http://localhost:3000 you should see the rails welcome message.

OK, so now we’ve got rails running on our local machine, talking to postgresql running in a container (but using a port-forward so that we can talk to it as if it were running locally).
This post is already getting pretty long, so we’ll add the code for our app. in the next part